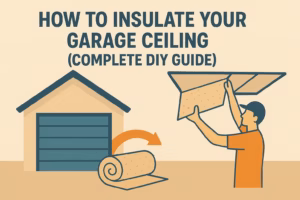
 Many homeowners overlook the garage ceiling when trying to improve energy efficiency — but this is one of the most critical areas for insulation. Since heat rises, an uninsulated ceiling can allow massive heat loss in winter and trap unwanted warmth in summer. In this step-by-step guide, you’ll learn how to insulate your garage ceiling properly to create a more comfortable, energy-efficient, and quieter workspace.
Why Insulate the Garage Ceiling?
- Temperature control: Keeps your garage cooler in summer and warmer in winter.
- Energy savings: Reduces HVAC workload if your garage connects to the house.
- Noise reduction: Insulation absorbs sound from tools, vehicles, and outside traffic.
- Protects rooms above: Prevents cold air from seeping into upstairs living areas.
Best Materials for Garage Ceiling Insulation
The ideal insulation depends on your ceiling type (exposed rafters, drywall, or attic above). Here are the top materials to consider:
- Fiberglass Batts: Affordable and easy to install; best for open joist ceilings.
- Foam Board Panels: Great for moisture resistance and low-profile insulation.
- Blown-in Cellulose: Perfect for attics above garages — fills small gaps effectively.
- Reflective Foil Insulation: Ideal for hot climates where radiant heat is the issue.
Recommended Product: Owens Corning R-19 Fiberglass Insulation Roll
This highly rated fiberglass insulation is designed for garage and basement ceilings. It provides excellent thermal resistance and easy DIY installation.
Tools and Supplies You’ll Need
- Insulation material (batts, foam board, or blown-in)
- Measuring tape and utility knife
- Protective gloves, goggles, and mask
- Staple gun or insulation supports
- Vapor barrier (if required for your climate)
Step-by-Step Installation
Step 1: Measure and Prepare
Measure the distance between your ceiling joists and the total ceiling area. Clean out any dust or debris. Turn off power to any electrical fixtures before starting.
Step 2: Install Insulation Between Joists
Fit fiberglass batts or foam panels snugly between ceiling joists. Avoid compressing the material, as this reduces insulation efficiency.
Step 3: Add a Vapor Barrier (Optional)
If you live in a humid or cold climate, install a plastic vapor barrier beneath the insulation to prevent condensation and moisture buildup.
Step 4: Seal Gaps and Edges
Use spray foam or caulk to seal gaps around lights, vents, or attic hatches. Every small crack matters for energy efficiency.
Also Recommended: 3M Spray Foam Insulation Sealant
Perfect for filling small gaps around fixtures and edges. Expands evenly and provides long-lasting air sealing.
Step 5: Add Drywall or Panels (Optional)
For a clean, finished look, install drywall or plywood panels over your insulated ceiling. This not only improves aesthetics but adds a layer of fire resistance and soundproofing.
Maintenance Tips
- Check insulation annually for moisture or pest damage.
- Replace or patch damaged sections promptly.
- Seal new wiring or light fixtures that may create gaps.
Maximize Your Garage Comfort
Once your ceiling is insulated, take your efficiency to the next level with a garage door insulation kit — it’s the perfect finishing touch.
“I get commissions for purchases made through links in this post.”