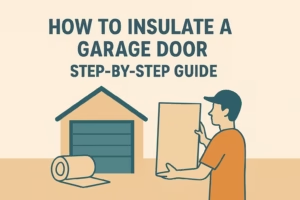
 How to Insulate a Garage Door: Step-by-Step Guide
Plan & Pick the Right Material
Decide between reflective foil (fast install), rigid foam board (high R-value per inch), and fiberglass panels (good for cold climates). Consider moisture potential — closed-cell foam resists moisture better than fiberglass.
Tools & Materials
- Tape measure, marker, utility knife
- Straightedge or T-square
- Insulation material (Reflective kit / Foam boards / Fiberglass panels)
- Double-sided tape, construction adhesive or staples
- Weatherstripping and bottom/bulb seal
- Gloves, eye protection, dust mask (especially for fiberglass)
Step 1 — Measure & Template
Measure each door panel width and height. Note that many sectional doors have identical panels — but always measure each to confirm. Make paper templates if you prefer a visual guide; label templates by panel number (top to bottom).
Step 2 — Cutting & Fit
Lay material on a flat surface, transfer measurements, and cut with a sharp utility knife for foil and foam; use a fine-tooth saw for fiberglass if required. Allow a small clearance (1/8\”) if manufacturer recommends expansion gap. Keep pieces labeled.
Step 3 — Attachment Methods
Reflective foil: use heavy-duty double-sided tape or staples; ensure a snug fit. Foam board: bead construction adhesive or use tape; press firmly and hold until set. Fiberglass panels: follow kit instructions — adhesive or mechanical fasteners may be used.
Step 4 — Sealing & Weatherstripping
Seal gaps between panels and add a bottom bulb or sweep. Use foam tape for side gaps. Proper sealing stops convective air flow and improves overall performance far more than slightly thicker insulation alone.
Step 5 — Test & Rebalance
Cycle the door slowly to ensure no binding. If the opener strains after insulation, check spring balance and opener force — added weight may need adjustment. Rebalance the door if necessary or remove excess material.
Common Mistakes to Avoid
- Skipping measurements — inaccurate cuts cause gaps.
- Not wearing protection with fiberglass — irritation and inhalation risk.
- Poor edge sealing — reduces insulation effectiveness.
- Failing to test door operation — could damage opener or panels.
Pro Tips
Label pieces, work panel-by-panel, and take photos during removal/installation for reference. If in doubt about opener capacity, install lighter material (reflective or foam) and consider upgrading the opener if you add heavy panels.
👉 Buy recommended insulation kits on Amazon
“I get commissions for purchases made through links in this post.”