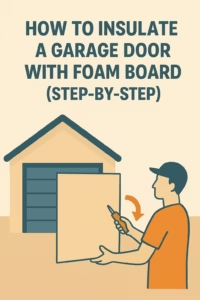
 How to Insulate a Garage Door With Foam Board (Step-by-Step Guide)If your garage gets too hot in summer or freezing in winter, foam board insulation is one of the most affordable and effective ways to regulate temperature. It’s lightweight, easy to install, and offers excellent R-value performance — perfect for DIY homeowners.In this guide, we’ll walk you through how to insulate your garage door with foam board step by step, using simple tools and materials available online or at your local hardware store.
Why choose foam board for garage door insulation?
Foam board (also called rigid foam insulation) is made from materials like polystyrene (EPS), extruded polystyrene (XPS), or polyisocyanurate (ISO). It’s a popular choice because it provides:
- High R-value: R-4 to R-6 per inch of thickness.
- Moisture resistance: Won’t absorb water or mold easily.
- Easy installation: No special tools or adhesives needed.
- Durability: Rigid panels stay in place for years.
👉 Shop top-rated foam board insulation kits on Amazon
What you’ll need
- Foam board insulation (EPS or XPS)
- Utility knife or insulation cutter
- Tape measure
- Straight edge or metal ruler
- Heavy-duty double-sided tape or adhesive
- Safety gloves and goggles
Pro tip: Measure your garage door panels before buying insulation. Most standard panels fit ½-inch thick foam boards.
Step 1: Measure your garage door panels
Use a tape measure to record the width and height of each individual door panel. Panels are rarely uniform, so measure each one separately for an exact fit. Write down the dimensions before cutting.
Step 2: Cut the foam boards
Lay the foam board on a flat surface and mark your measurements using a pencil and straight edge. Carefully cut along the lines with a sharp utility knife. Always wear gloves and goggles for safety.
Tip: It’s better to cut the foam slightly larger (about ⅛ inch extra) so it fits snugly inside each panel.
Step 3: Test fit each piece
Before securing the foam, insert it into the garage door panel to check the fit. The piece should stay in place by friction — not too tight, but without gaps.
Step 4: Attach insulation panels
Apply small strips of heavy-duty double-sided tape or use low-VOC construction adhesive along the panel edges. Press the foam board firmly into place, starting from the bottom and working upward.
Avoid using too much adhesive, as it may warp the foam or the metal panel.
Step 5: Seal edges (optional)
For maximum efficiency, seal small gaps around the foam boards with aluminum tape or weatherproof caulk. This step helps prevent air leaks and adds a clean finish to the door’s interior.
Step 6: Inspect for balance and clearance
After installing the insulation, open and close your garage door slowly to check its balance. Foam board adds only minimal weight, but if your door struggles to lift, you may need a minor spring adjustment.
Step 7: Clean up and enjoy your insulated garage
Wipe away any adhesive residue and inspect all panels for loose edges. Once finished, you’ll notice an immediate improvement in temperature stability and noise reduction.
👉 See full foam board insulation kits on Amazon
Additional tips for better performance
- Combine foam board insulation with weatherstripping around the door edges for a complete seal.
- In extremely cold climates, consider double-layer insulation using XPS plus a reflective foil layer.
- Check your insulation every 1–2 years for cracks, moisture, or detachment.
Estimated cost
For a single-car garage door (9×7 ft):
| Item | Cost |
|---|---|
| Foam board sheets (4–6) | $60 – $100 |
| Adhesive or tape | $10 – $20 |
| Weatherstripping (optional) | $15 – $25 |
| Total | $85 – $145 |
Even at the higher end, that’s far cheaper than replacing your garage door or hiring professional installers.
Benefits of foam board insulation
- Improves garage comfort year-round
- Reduces noise and outside heat transfer
- Prevents condensation and corrosion on metal doors
- Boosts overall home energy efficiency
Final thoughts
Foam board insulation is one of the best DIY upgrades you can make to your garage. It’s inexpensive, quick to install, and can dramatically improve comfort without professional help. With just a few hours of work, you’ll enjoy a quieter, warmer, and more energy-efficient garage space.
👉 Buy foam board garage door insulation kits on Amazon
“I get commissions for purchases made through links in this post.”